Smartphones have revolutionized photography, making it easier than ever to capture stunning outdoor shots without the need for a bulky DSLR. Whether you’re hiking in the mountains, exploring national parks, or simply enjoying nature in your backyard, a few simple techniques can elevate your smartphone photography to professional levels. In this guide, we’ll cover how to take breathtaking outdoor photos with your smartphone, from composition tips to editing tricks.
Why Use a Smartphone for Outdoor Photography?
Smartphones today come with advanced camera features, making them excellent tools for outdoor photography. Here’s why they work so well:
- Portable & Convenient – Always in your pocket, ready to shoot.
- AI-Powered Enhancements – Modern smartphones adjust exposure, focus, and white balance automatically.
- High-Quality Lenses – Wide-angle, telephoto, and macro lenses offer DSLR-like capabilities.
- Easy Editing & Sharing – Edit photos instantly and share them on social media or with friends.
1. Master Natural Light for Outdoor Shots
Lighting is the most important factor in photography. Here’s how to use it effectively:
Best Times for Outdoor Photography
- Golden Hour – The soft, warm light right after sunrise and before sunset creates magical images.
- Blue Hour – Just before sunrise or after sunset, the sky has a cool, dramatic hue perfect for landscapes.
- Overcast Days – Clouds act as a natural diffuser, preventing harsh shadows and giving even lighting.
How to Work with Harsh Sunlight
- Use Shadows Creatively – Position your subject under a tree or rock formation to avoid overexposure.
- Adjust Exposure Manually – Tap on your smartphone screen to adjust brightness.
- Try HDR Mode – High Dynamic Range (HDR) helps balance light and dark areas in high-contrast scenes.
2. Use the Right Composition Techniques
A well-composed image stands out. Here are the best techniques for framing and composing outdoor shots:
Rule of Thirds
- Enable the grid feature on your phone and place your subject where the lines intersect.
- This creates a balanced, professional-looking photo.
Leading Lines
- Roads, rivers, trails, or fences naturally guide the eye toward the main subject.
Foreground Interest
- Add elements like rocks, flowers, or water in the foreground for depth.
Frame Within a Frame
- Use trees, windows, or caves to frame your subject for a unique perspective.
Negative Space
- Leaving space around your subject makes the image feel more dramatic and less cluttered.
3. Adjust Camera Settings for Better Quality
Even without professional gear, you can enhance your smartphone camera settings:
Use Pro or Manual Mode
- Adjust ISO, shutter speed, and focus for more control over lighting and motion.
Lock Focus and Exposure
- Tap and hold on your subject to lock focus and adjust exposure for perfect sharpness.
Shoot in RAW Mode
- RAW images capture more detail and allow for better post-processing.
Use Grid & Level Tools
- Helps keep the horizon straight, especially in landscape photography.
4. Capture Stunning Landscapes
Outdoor photography often focuses on landscapes, and mastering the right techniques can turn an average shot into a breathtaking one. Since landscapes are vast and expansive, your smartphone’s camera needs the right approach to capture their grandeur. Here’s how to get it right:
Use a Wide-Angle Lens
Most smartphones today come with an ultra-wide camera mode, which allows you to fit more of the scenery into your shot. This is ideal for capturing sweeping mountain ranges, dramatic coastlines, and vast open plains.
- How to Enable It: Open your camera app and look for the 0.5x zoom or “ultra-wide” option.
- Best Time to Use It: When shooting sunrises, sunsets, or dramatic cloudscapes, as the wide lens will enhance the sky’s depth and detail.
- Pro Tip: Be mindful of distortion, especially at the edges of the frame. Adjust the angle slightly to maintain a natural perspective.
Find a Focal Point
A good landscape photo isn’t just a wide, empty expanse—it needs a strong focal point to draw the viewer’s eye.
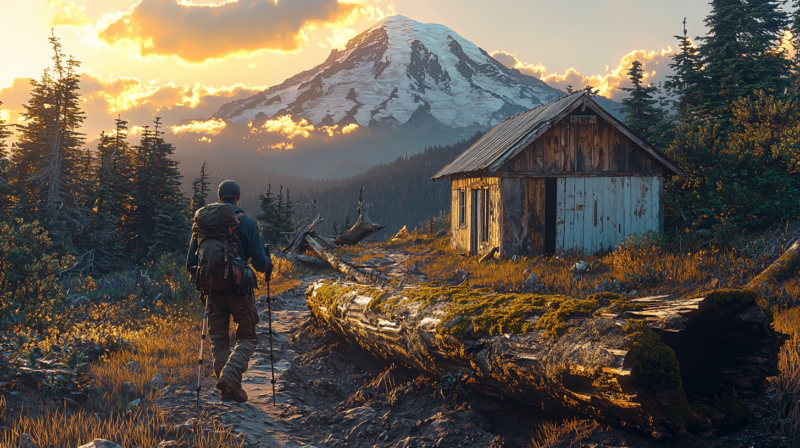
- Look for a mountain peak, a lone tree, a dramatic rock formation, or a small cabin in the distance.
- Placing your focal point according to the Rule of Thirds (instead of directly in the center) often makes the image more visually dynamic.
- If your scene feels cluttered, simplify the composition by adjusting your angle or cropping unnecessary elements.
Include Scale
A landscape can seem flat or unimpressive if there’s nothing in the frame to show just how vast it really is. Adding an element of scale brings the scene to life.
- What Works Well for Scale? A person standing on a cliff edge, a tent set up near a lake, or a winding trail leading into the distance.
- Why It Works: Our brains naturally compare sizes, so seeing a small human figure against towering mountains or massive trees creates a sense of awe and perspective.
- Pro Tip: Have your subject wear bright colors (red, orange, or yellow) to make them stand out against nature’s greens and blues.
Try Panorama Mode
When a single frame isn’t enough, panorama mode is a great way to capture the full scope of a landscape. This works especially well for:
- Expansive mountain ranges
- Oceans and coastlines
- Cityscapes viewed from a high vantage point
- Sunset skies with dramatic cloud formations
How to Use It Effectively:
- Hold your phone steady and pan slowly across the scene.
- Keep the horizon level to avoid unnatural distortions.
- Avoid moving objects (such as people or vehicles), as they can create weird visual glitches.
Bonus Tip: Capture Different Weather Conditions
Many people only take landscape photos on bright, sunny days—but mist, fog, rain, and storms can add an element of mystery and drama. Experiment with different conditions:
- Morning fog over a lake makes for an ethereal, dreamlike shot.
- Storm clouds rolling over mountains add intensity to the image.
- Snow-covered landscapes create a clean, minimalistic aesthetic.
By combining these techniques, you’ll be able to transform your outdoor shots into breathtaking, high-impact images that truly showcase nature’s beauty.
5. Enhance Wildlife & Macro Photography
Nature photography isn’t just about landscapes—wildlife and close-ups can also be stunning.
Wildlife Photography Tips
- Use Burst Mode – Captures multiple shots quickly to get the best frame.
- Keep Your Distance – Use digital zoom carefully to avoid loss of detail.
- Patience is Key – Wait for the perfect moment rather than rushing the shot.
Macro Photography for Close-Ups
- Get Close to Your Subject – Flowers, insects, and textures work well for macro shots.
- Use Manual Focus – Some phones allow fine-tuned focus for better details.
- Avoid Shadows – Get the right angle so your phone doesn’t cast a shadow on your subject.
6. Improve Low-Light and Night Photography
Shooting at night or in low-light conditions? Try these smartphone techniques:
Use Night Mode
- Most modern smartphones have an AI-powered night mode that brightens images without overexposing them.
Stabilize Your Phone
- Hold your phone steady or use a small tripod to reduce blur.
Experiment with Long Exposure
- Some camera apps let you capture light trails, waterfalls, or stars using long exposure settings.
7. Edit Like a Pro
Great photos become even better with smart editing. Use free editing apps like Snapseed, Lightroom Mobile, or VSCO.
Editing Tips for Outdoor Photos
- Adjust Brightness & Contrast – Enhances details and makes photos pop.
- Increase Sharpness – Brings out textures in landscapes.
- Play with Colors – Adjust saturation and white balance for a natural look.
- Remove Distractions – Use the healing tool to erase unwanted objects.
8. Essential Gear for Smartphone Photography
Want to take your outdoor photography to the next level? Here are some small, lightweight accessories to improve your shots:
- Clip-On Lenses – Wide-angle, macro, and fisheye lenses enhance creativity.
- Mini Tripod – Great for night photography and stability.
- Bluetooth Remote – Avoids camera shake when taking shots.
- Waterproof Phone Case – Protects your phone when shooting in rivers or rain.
- Portable Charger – Keeps your phone powered for all-day photography.
9. Best Outdoor Photography Apps
These apps will enhance your photography experience with extra features:
- Snapseed (Best free photo editor)
- Lightroom Mobile (Professional editing tools)
- ProCamera (Manual camera controls)
- PhotoPills (Best for planning sunrise, sunset, and star photography)
Final Thoughts
With the right techniques, composition skills, and editing tools, your smartphone can capture stunning outdoor photography just as well as a DSLR. Whether you’re snapping landscapes, wildlife, or creative macro shots, these tips will help you elevate your outdoor photography skills.
Now, grab your phone and start exploring—your next stunning shot is just a click away! 📸🌿